Vadovas EGO CS1810E Grandininis pjūklas

Reikia vadovo savo EGO CS1810E Grandininis pjūklas? Žemiau galite nemokamai peržiūrėti ir atsisiųsti PDF vadovą lietuvių kalba. Šiuo metu šis produktas turi 3 dažniausiai užduodamus klausimus, 0 komentarų ir 0 balsų. Jei tai ne tas vadovas, kurio norite, susisiekite su mumis.

Jūsų gaminys sugedęs, o vadove nėra jokio sprendimo? Eikite į Repair Café ir gaukite nemokamas remonto paslaugas.

Vadovas

Loading…

56 VOLT LITHIUM-ION CORDLESS CHAIN SAW — CS1810E10
EN
3. Lift up the semicircular plate and rotate the oil tank
cap counterclockwise to remove it (Fig. H).
4. Carefully pour the bar and chain oil into the tank. Fill to
the bottom of the fill neck.
5. Wipe off any excessive oil and replace the cap.
NOTICE: Check the oil level frequently and fill when the oil
level falls below the minimum line. Never operate the chain
saw if the oil is not visible.
ATTACHING/DETACHING THE BATTERY PACK
Use only with EGO’s battery packs and chargers listed in Fig.
A2.
Fully charge before first use.
To Attach
Align the battery ribs with the mounting slots and press the
battery pack down until you hear a “click” (Fig. I).
To Detach
Depress the battery-release button and pull the battery pack
out (Fig. J).
STARTING/STOPPING THE CHAIN SAW
NOTICE:
Before starting the chain saw, check for the oil
level, saw teeth sharpness and properly working kickback
brake handle. Besides, balanced footing and proper
distance away from the ground are needed.
To Start (Fig. K)
1. Pull the chain-kickback brake handle towards the front
handle to the operating position (Fig. K).
2. Firmly grasp the front handle with the left hand and the
rear handle with the right hand.
WARNING: To avoid injury, always use the chain saw
with the right hand grasping the gripping area of the rear
handle (Fig. L).
3. Press and hold the lock-off button with the thumb of
your right hand, then squeeze the trigger switch with
the fingers of your right hand to start the saw (Fig. L).
L-1 Gripping Area
4. Release the lock-off button and continue to squeeze
the trigger switch for continued operation.
5. The further the trigger switch is depressed, the greater
the chain speed. Adjust the speed to suit the task at
hand.
WARNING: Do not attempt to start the saw when the
saw chain is in a cut.
To Stop
1. Move the chain saw away from cutting area, and
then release the trigger switch to stop the chain saw.
2. Push the chain-kickback brake handle forward to the
brake position to engage the chain brake (Fig. K).
WARNING: Always remove the battery pack from the
machine during work breaks and after finishing work.
CHANGING SPEED MODE (FIG. M)
This machine features two speed modes. Each speed
mode the limits the maximum speed of the chain saw.
The speed mode will change with every press of the chain
speed button.
The speed bars on the LED screen will display the active
speed mode: one bar for low speed, and two bars for high
speed. The low speed mode (ECO) provides better control
of the machine and longer operating time per charge.
M-1 Speed Bars M-4 Brake Icon
M-2
Low Brightness
Headlight Icon
M-5 Headlight Button
M-3
High Brightness
Headlight Icon
M-6
Chain Speed
Button
NOTE: The machine's speed memory function will
remember the last speed setting and activate it the next
time the machine is turned on.
NOTE: The LED screen lights up when trigger switch is
pulled or when the speed button or headlight button is
pressed. It will automatically turn off after approximately
60 seconds of chain saw inactivity.
LED HEADLIGHT (Fig. N)
The LED headlight is located in the front of the chain saw
housing. The headlight provides illumination for increased
visibility and features 2 brightness levels.
To turn on the headlight, press the headlight button (Fig.
M) one time. The headlight will turn on in low brightness
level and the low brightness headlight icon will appear
on the LED screen. Press the headlight button again to
switch to high brightness level and the high brightness
headlight icon will appear on the LED screen.
To turn off the headlight, press the headlight button the
third time and the headlight icon will turn off on the LED
screen.
N-1
Low Brightness
Headlight Icon
N-3 LED Headlight
Atsisiųsti vadovą lietuvių kalba (PDF, 43.02 MB)
(Tausokite gamtą ir spausdinkite šį vadovą tik tada, kai tai tikrai būtina)

Loading…

Įvertinimas

Praneškite mums, ką manote apie EGO CS1810E Grandininis pjūklas, pateikdami produkto įvertinimą. Norite pasidalyti savo patirtimi apie šį produktą arba užduoti klausimą? Palikite komentarą puslapio apačioje.
Ar esate patenkinti EGO CS1810E Grandininis pjūklas?
Taip Ne
Būkite pirmieji įvertinę šį produktą
0 balsai

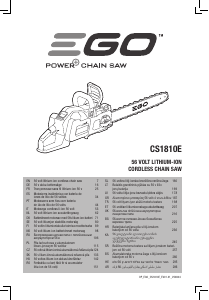
Prisijunkite prie pokalbio apie šį produktą

Čia galite pasidalinti savo nuomone apie EGO CS1810E Grandininis pjūklas. Jei turite klausimų, pirmiausia atidžiai perskaitykite vadovą. Užklausą dėl vadovo galite pateikti naudodami mūsų kontaktinę formą.

Daugiau apie šį vadovą

Suprantame, kad puiku turėti popierinį savo EGO CS1810E Grandininis pjūklas vadovą. Visada galite atsisiųsti vadovą iš mūsų svetainės ir atsispausdinti patys. Jei norite turėti originalų vadovą, rekomenduojame susisiekti su EGO. Jie gali pateikti originalų vadovą. Ar ieškote savo EGO CS1810E Grandininis pjūklas vadovo kita kalba? Pasirinkite pageidaujamą kalbą mūsų pagrindiniame puslapyje ir ieškokite modelio numerio, kad pamatytumėte, ar jį turime.

Specifikacijos

Prekės ženklas EGO
Modelis CS1810E
Kategorija Grandininiai pjūklai
Failo tipas PDF
Failo dydis 43.02 MB

Visi EGO Grandininiai pjūklai vadovai
Daugiau Grandininiai pjūklai vadovų

Dažnai užduodami klausimai apie EGO CS1810E Grandininis pjūklas

Mūsų palaikymo komanda ieško naudingos informacijos apie produktą ir atsakymų į dažniausiai užduodamus klausimus. Jei dažniausiai užduodamuose klausimuose pastebėjote netikslumų, praneškite mums naudodamiesi mūsų kontaktų forma.

Koks yra tinkamas mano grandininio pjūklo grandinės įtempimas? Patvirtinta

Traukiant grandines ranka, jos turi galėti pakilti tiesiai virš arba po kreipiančiosios juostos.

Tai buvo naudinga (990) Skaityti daugiau

Ar naudojant grandininį pjūklą reikia dėvėti klausos apsaugos priemones? Patvirtinta

Taip, tu turėtum. Nors grandininio pjūklo skleidžiamo triukšmo kiekis gali skirtis priklausomai nuo prekės ženklų ir modelių, ilgalaikis stiprus triukšmas gali sukelti negrįžtamus klausos pažeidimus. Štai kodėl verta nešioti klausos apsaugos priemones.

Tai buvo naudinga (178) Skaityti daugiau

Ar naudojant grandininį pjūklą reikia dėvėti akių apsaugą? Patvirtinta

Taip. Pjovimo metu gali išskristi smulkios dalelės. Kai jie patenka į akį, jie gali sukelti nuolatinį akių pažeidimą. Štai kodėl visada būtina dėvėti akių apsaugą.

Tai buvo naudinga (167) Skaityti daugiau
Vadovas EGO CS1810E Grandininis pjūklas
×
Download