
6
14. When finished, disconnect the grill from the power source and allow it to cool.
13. Before adding the next batch of food to be grilled, close the top housing so that the heating plates reach the set temperature.
1. Place the grill on a clean, flat surface.
2. Clean the housing with a damp and then dry cloth (or a paper towel).
7. To set the time after which the device will turn off, set the time by pressing the button (9i). The display (9h) will show the set time, after
which the device will turn off with 5 beeps. The device can be turned off beforehand by pressing the (9a) ON / OFF button.
2. Place the fat trey (7) in the designated place (5).
3. To unfold the grill, slide the lock clamp (6) to position (6c) 180˚ (Fig. 1)
3. To clean the heating plates, remove them from the housing by pressing the buttons (8).
Table grill function - grilling food on one side.
4. Unfold the top and bottom heating plates to create one large grill surface.
8. Fully open the top housing by grasping the handle (1) and evenly distributing the food on the heating plate.
The device will go into standby mode.
5. To start the lower heating plate, press the knob (9b), then set the desired temperature by turning the knob to the right to increase the
temperature (max. 230 C˚), or to the left to reduce the temperature (min. 60 C˚). The display (9d) will show the set temperature. The
temperature on the display will flash 5 times and the device will start warming up. The thermostat indicator light for the upper heating
plate (9f) will turn red to indicate that the heating plate is heating up, and the green light indicates that the heating plate has reached the
set temperature.
12. Open the top housing and remove the food on the grill with a plastic spatula.
5. Grill the food on one side, then transfer it to the other side.
CLEANING AND MAINTENANCE
1. Before cleaning the grill, make sure it is cool to the touch and unplugged from the power source.
Clean the plates with oven cleaner or in the dishwasher.
4. Do not immerse in water.
display (9e) "---"
After cleaning, wipe the cleaned plates dry and reinstall in the device.
CAUTION: Do not use metal cutlery or sharp kitchen tools as they can damage the heating plates.
6. Wait for about 10 minutes. After this time, the device should reach the required temperature and the thermostat indicator lights (9f)
and (9g) will turn green.
9. Grasp the top housing handle (1) on the grill and close it.
11. During grilling, the indicator lights of the thermostats (9f and 9g) will change from red to green, which means that the thermostats
work cyclically, maintaining the right temperature of the heating plates.
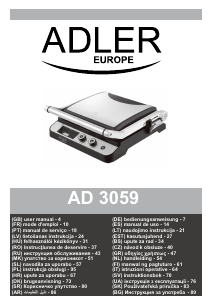
The device is equipped with a height adjustment of the top housing (6a), which can be set to one of five positions by moving the locking
clip (6) (Fig. 2).
10. The grilling time takes from several to several minutes and depends on the type of food used for grilling and the temperature level.
Proceed in the same way using the knob (9c) for the upper heating plate.
Maximum power: 3000W
TECHNICAL DATA:
Power source: 220-240V ~ 50 / 60Hz
Nominal power: 2000W
5. Store with the top housing closed and locked by moving the lock clamp (6) to position (6b).
1. Make sure both heating plates are clean. If necessary, wipe the grill with a damp cloth.
Contact grill function - grilling food on both sides at once.
3. Place the fat tray (7) in the place intended for this (5).
4. Press the (9a) ON / OFF button, and the display will read:
display (9d) "---"
2. Place the grill on a dry, flat surface and connect to a power source. The power indicator light (9a) will flash and the grill will emit a
short sound 'be'.
display (9h) "00"
To protect your environment: please separate carton boxes and plastic bags and
dispose them in corresponding waste bins. Used appliance should be delivered to
the dedicated collecting points due to hazarsous components, which may effect the
environment. Do not dispose this appliance in the common waste bin.

Prisijunkite prie pokalbio apie šį produktą
Čia galite pasidalinti savo nuomone apie Adler AD 3059 Sąlyčio kepsninė. Jei turite klausimų, pirmiausia atidžiai perskaitykite vadovą. Užklausą dėl vadovo galite pateikti naudodami mūsų kontaktinę formą.